Important update from TheSchoolRun
For the past 13 years, TheSchoolRun has been run by a small team of mums working from home, dedicated to providing quality educational resources to primary school parents. Unfortunately, rising supplier costs and falling revenue have made it impossible for us to continue operating, and we’ve had to make the difficult decision to close. The good news: We’ve arranged for another educational provider to take over many of our resources. These will be hosted on a new portal, where the content will be updated and expanded to support your child’s learning.
What this means for subscribers:
- Your subscription is still active, and for now, you can keep using the website as normal — just log in with your usual details to access all our articles and resources*.
- In a few months, all resources will move to the new portal. You’ll continue to have access there until your subscription ends. We’ll send you full details nearer the time.
- As a thank you for your support, we’ll also be sending you 16 primary school eBooks (worth £108.84) to download and keep.
A few changes to be aware of:
- The Learning Journey weekly email has ended, but your child’s plan will still be updated on your dashboard each Monday. Just log in to see the recommended worksheets.
- The 11+ weekly emails have now ended. We sent you all the remaining emails in the series at the end of March — please check your inbox (and spam folder) if you haven’t seen them. You can also follow the full programme here: 11+ Learning Journey.
If you have any questions, please contact us at [email protected]. Thank you for being part of our journey it’s been a privilege to support your family’s learning.
*If you need to reset your password, it will still work as usual. Please check your spam folder if the reset email doesn’t appear in your inbox.
6 parent-friendly STEM activities

Technology is continually evolving and changing the way we live, work and learn. The world of science, engineering, technology and mathematics is an exciting one, but for parents who lack confidence in these topics it can be mind-boggling. However, STEM learning doesn't have to be strenuous or expensive and you can learn the basics with really fun, easy games.
Here are six STEM activities from the authors at QuestFriendz to help you inspire your children to love STEM and build your own STEM confidence along the way.
STEM activities for 4-7 years
Flying competition
What you need: Paper (different types of paper and other materials such as aluminium foil), tape
Activity: Create a plane that glides the furthest. Make paper aeroplanes using different folding methods and using materials found around the house (e.g., aluminium foil, parchment, cardboard, glitter paper). Let the children determine what materials can be used and should not be used and why. You can ask the children what they think the result might be if they use a heavier paper (e.g., cardboard) versus a light paper (e.g., parchment paper). You can also ask where it is important to fold the material to have a more solid plane. For example, adding folds to the plane strengthens the structure of the plane.
Then you’re ready to race each plane to see which materials and designs fly the fastest and which can fly the furthest. Encourage children to make predictions before each flight and record your results!
Coding with cards
What you need: a deck of cards, masking tape, small toys (e.g., cars, small figurines, dice, etc).
Activity: Begin by setting up a grid using the deck of cards and securing them to the floor using masking tape. A grid of 7x7 cards works well. You can also involve your children in the set-up by asking them to count the cards as you place them. Next, place some toys on top of the cards. To begin with place only 3-5 toys. Once children have become more familiar with the game you can increase the number of toys or objects in the grid. Choose one toy to be the ‘robot’ that you are going to give instructions to.
Place the ‘robot’ in the start position and tell children where the end position is. If you want, you can place a prize at the end. Children will then need to give the ‘robot’ coding instructions to get from the start to the end, making sure to avoid the toy obstacles placed around the grid. Make sure to move the ‘robot’ exactly following your children’s instructions. If they make a mistake, encourage them to debug the coding by giving a new set of instructions to correct the error.
Once children become confident with the activity, make it more challenging by asking them to give the full code in advance before trying it out. If they spot any errors, allow them to debug the code and try again!
STEM activities for 8-11 years
Wind racing lego contest
What you need: LEGO (including LEGO wheels), wooden kebab sticks or bamboo sticks, paper (different types and materials, such as parchment and tissue paper), a large fan
Activity: The aim of the activity is to create a vehicle out of LEGO pieces and race it against others. Before beginning construction of the vehicle, encourage children to think about the design. If you have time, they can draw their design plans on paper first. Ask them how tall they want to build their vehicle and why. You can also ask children to think about whether they think a lighter or heavier vehicle will be faster or which will be sturdier. Encourage children to think about the shape of the vehicle; for instance, a more streamlined design is likely to be faster. Remind them that they will be attaching the wooden kebab sticks/bamboo sticks to the vehicle to make a sail. Again, use questions to prompt their thinking. For example, ask them which type of paper they want to use for the sail and why.
Once they have chosen their design, children build their vehicle out of LEGO using as many pieces as desired. Allow them to make changes to their original design if they want, supporting them by asking them to explain the reason for these changes. When the vehicles are ready, place them on the starting line and make predictions before the start of the race. Turn on the fan and record the results. After the race, allow children to make changes to their vehicle and race again to see if their vehicles are faster!
Shiny pennies experiment
What you need: 10-20 dirty 1p or 2p coins, 1 teaspoon of salt, ¼ cup of white vinegar, a bowl, paper towels
Activity: Put the vinegar and the salt in the bowl and stir it until the salt dissolves. Take one coin and ask children to predict what they think will happen to it when they dip it in the liquid. Dip the coin halfway into the liquid for about 10 seconds. When you pull it out, ask children what they see. Take all the remaining coins and place them all fully in the liquid. Let children watch them for the first few seconds and observe what is happening to them. Leave the coins in the liquid for about 5 minutes.
Take half of the coins out of the liquid and put them on a paper towel. On the second paper towel write ‘rinsed’. Take the remaining half of the coins out of the liquid, rinse them very well under some running water and place then on the second paper towel to dry. Ask children to predict what they think will happen to the coins on each of the paper towels. After about an hour, see what has happened.
Explain to children that the vinegar and salt is a mixture of weak acid which helps to dissolve the copper oxide on the coins that made them look dirty and dull. The unrinsed pennies will turn blue-green because the mixture makes it easier for the copper atoms on the coins to join with oxygen from the air and the chlorine from the salt to make a compound called malachite.


Start a unique learning programme!
- Weekly programme for each school year
- Worksheets sent direct to your inbox
- Keeps your child's learning on track
STEM Activities for 12+ years
Create a mini robot
What you need: Toothbrush (with straight flat bristles), 1.5-volt coin cell battery, vibration motor (e.g., from a pager or mobile phone), scissors, wire cutters, double-sided foam tape
Activity: Cut off the handle of the toothbrush using wire cutters so that you are left with just the head. You may want to file down any sharp edges using a nail file or sandpaper. Next, strip a little bit of the plastic covering from the wires on the motor using wire strippers or a craft knife. This is a useful opportunity to discuss the positive and negatives poles of a battery with children. Stick one side of the double-sided foam tape to the toothbrush head, towards the opposite end from where the handle was originally. Stick the motor on the end near to where the handle was, with the wires facing out towards the first foam pad. Place the vibration motor on top of the foam pad, with the positive side facing upwards. You will then need to hook the vibration motor to the battery. It may be necessary to solder the motor terminals to the copper wire leads or you may be able to secure them with clear tape.
Your robot will now be ready to decorate! You can add googly eyes, pipe cleaners or pom poms. Allow children to be imaginative and be as creative as they want with their decoration.
Stop motion animation
What you need: Smartphone or tablet, tripod/stand, Stop Motion App (e.g., Stop Motion Studio or I can Animate, both of which are free to download), objects to animate (e.g., figurines, LEGO characters or objects, toys), lamp to illuminate the set
Activity: Ask children to plan or storyboard a single scene. Simpler scenes with fewer objects will be easier to work with, particularly for a first project. Encourage children to think of all elements in the scene, including the set and what it will be made from. The next step is to create the set. Allow children to be creative. They can paint their own background, use LEGO or other construction toys/equipment to create a set, or even use an outdoor location (e.g., the garden). Once the set is complete and ready, set up your filming device. It’s useful to place it on a tripod or stand to keep it steady and make the filming process easier.
Once all the objects are in place, it’s time to use the Stop Motion App to create your movie! Encourage children to make very minor movements at a time. Although this is slower, it will help them to create a more effective movie. Once the filming is complete, allow children to add sound effects to the movie using the app and even explore different special effects. Then set up a mini home cinema and share their movie with family and friends!
More fun with STEM
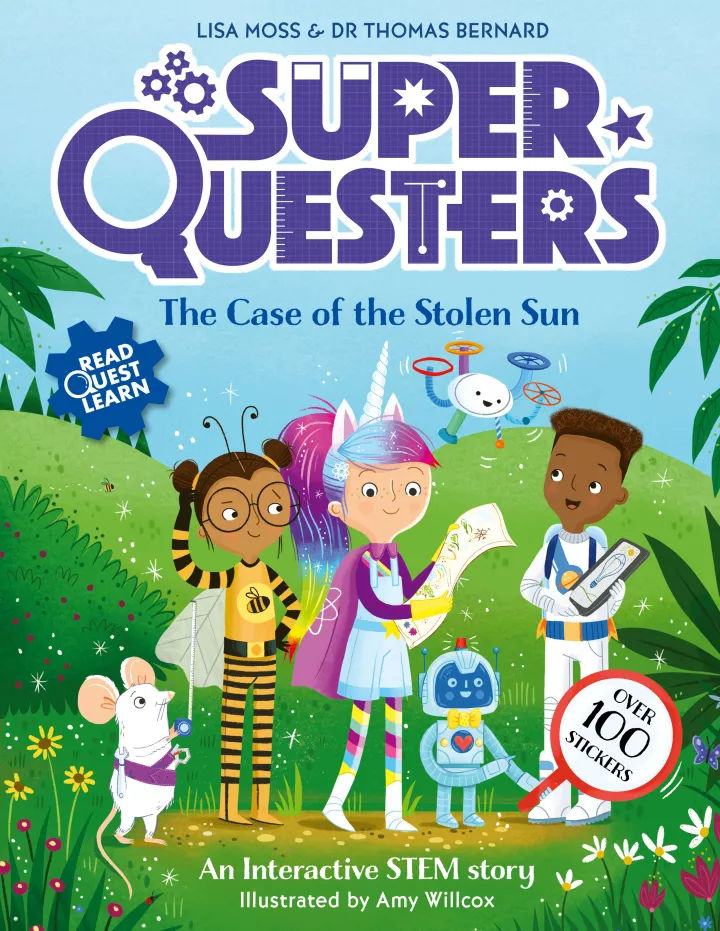
Lisa Moss and Dr Thomas Bernard are authors of SuperQuesters: The Case of the Stolen Sun. This fun learning adventure will develop your child’s STEM skills in line with the KS1 Computing, Maths and Science National Curriculum. The second book in the series, SuperQuesters: The Case of the Missing Memory, is out in November 2022.
For more STEM activities and resources check out QuestFriendz and TheSchoolRun’s no-budget STEM challenges that you can do at home.
