Important update from TheSchoolRun
For the past 13 years, TheSchoolRun has been run by a small team of mums working from home, dedicated to providing quality educational resources to primary school parents. Unfortunately, rising supplier costs and falling revenue have made it impossible for us to continue operating, and we’ve had to make the difficult decision to close. The good news: We’ve arranged for another educational provider to take over many of our resources. These will be hosted on a new portal, where the content will be updated and expanded to support your child’s learning.
What this means for subscribers:
- Your subscription is still active, and for now, you can keep using the website as normal — just log in with your usual details to access all our articles and resources*.
- In a few months, all resources will move to the new portal. You’ll continue to have access there until your subscription ends. We’ll send you full details nearer the time.
- As a thank you for your support, we’ll also be sending you 16 primary school eBooks (worth £108.84) to download and keep.
A few changes to be aware of:
- The Learning Journey weekly email has ended, but your child’s plan will still be updated on your dashboard each Monday. Just log in to see the recommended worksheets.
- The 11+ weekly emails have now ended. We sent you all the remaining emails in the series at the end of March — please check your inbox (and spam folder) if you haven’t seen them. You can also follow the full programme here: 11+ Learning Journey.
If you have any questions, please contact us at enquiries@theschoolrun.com. Thank you for being part of our journey it’s been a privilege to support your family’s learning.
*If you need to reset your password, it will still work as usual. Please check your spam folder if the reset email doesn’t appear in your inbox.
Handwriting practice: cursive letters
Our cursive letters worksheets are very detailed, and there are a lot of them! Your child might not need to complete every worksheet, and you will need to judge how best to use the materials for your own child. Handwriting Association expert Gwen Dornan shares her tips to help you make the most of the worksheets:
Before you sit your child down with pen and paper, make sure you know what handwriting style they are being taught at school. There are some differences in letter shapes taught in the UK and it can confuse children if they are asked to do something different at home and in the classroom. Look out for the following differences:
- An 'entry stroke' before each letter (see below for an 'n' with and without an entry stroke). If your school uses these strokes you could draw them in before giving your child the worksheets.

- The letters 'g', 'j' and 'y' can be made with a loop and joined to the following letter or with an open loop and not joined to the following letter.
- Some writing styles do not expect 'b', 'p' (and perhaps 's') to be joined to the following letter.
- Check how your child is expected to form 'f', 'v', 'w', 'x' and 'z' and adjust the worksheets accordingly.
Using the guide lines: how to pick the best cursive letters worksheet format for your child
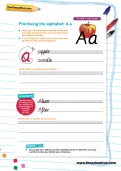
The cursive letter worksheets are available in three formats, each with a different set of ruled lines to help children size and form their letters correctly.
Format 1 (new writer) has a shaded area to show your child where to place the small letters ('a', 'e', 's', 'o', etc. and the lower parts of letters such as 'h', 'b', 'k'). Print the worksheets in Format 1 if your child is is learning joined writing for the first time and still writes in a fairly large script.
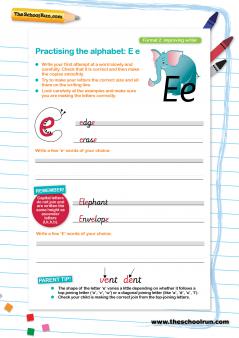
Format 2 (improving writer) offers a smaller writing area, but still has guide lines to help your child size letters correctly. Print the worksheets in Format 2 if your child has been working on their cursive style for a while and normally writes in a smaller size.
Format 3 (handwriting practice) has single ruled base lines. When children understand the relative sizes of the letters and can manage to keep sizes consistent without the help of the shaded area and guide lines, they are ready to use the single-lined paper. Make this change as soon as your child is ready.
There are no guidelines to mark the heights of the tall strokes (ascenders) or tails (descenders) on the worksheets; children are encouraged to judge their size by eye. This is because using extra guidelines like these can be counter-productive; once such guidelines are removed children often make their tall letters touch the writing line above, cluttering the horizontal space between the lines of writing and making the piece of work less easy to read.
For more handwriting worksheets and lots of advice about improving your child's handwriting see our Handwriting Learning Journey.